Draw a Circle on Google Maps Android
The Google Maps API for Android offers some simple ways for you to add shapes to your maps in gild to customize them for your application.
- A
Polylineis a serial of connected line segments that can form any shape you want and can be used to marking paths and routes on the map. - A
Polygonis an enclosed shape that can be used to mark areas on the map. - A
Circleis a geographically accurate projection of a circle on the World's surface drawn on the map.
For all these shapes, you tin customize their advent past altering a number of properties.
Code samples
The tutorial on adding polygons and polylines to stand for areas and routes includes all the code for a elementary Android app.
In addition, the ApiDemos repository on GitHub includes samples that demonstrate the use of shapes and their features:
- CircleDemoActivity (Java / Kotlin): Circle
- PolygonDemoActivity (Java / Kotlin): Polygon
- PolylineDemoActivity (Java / Kotlin): Polyline
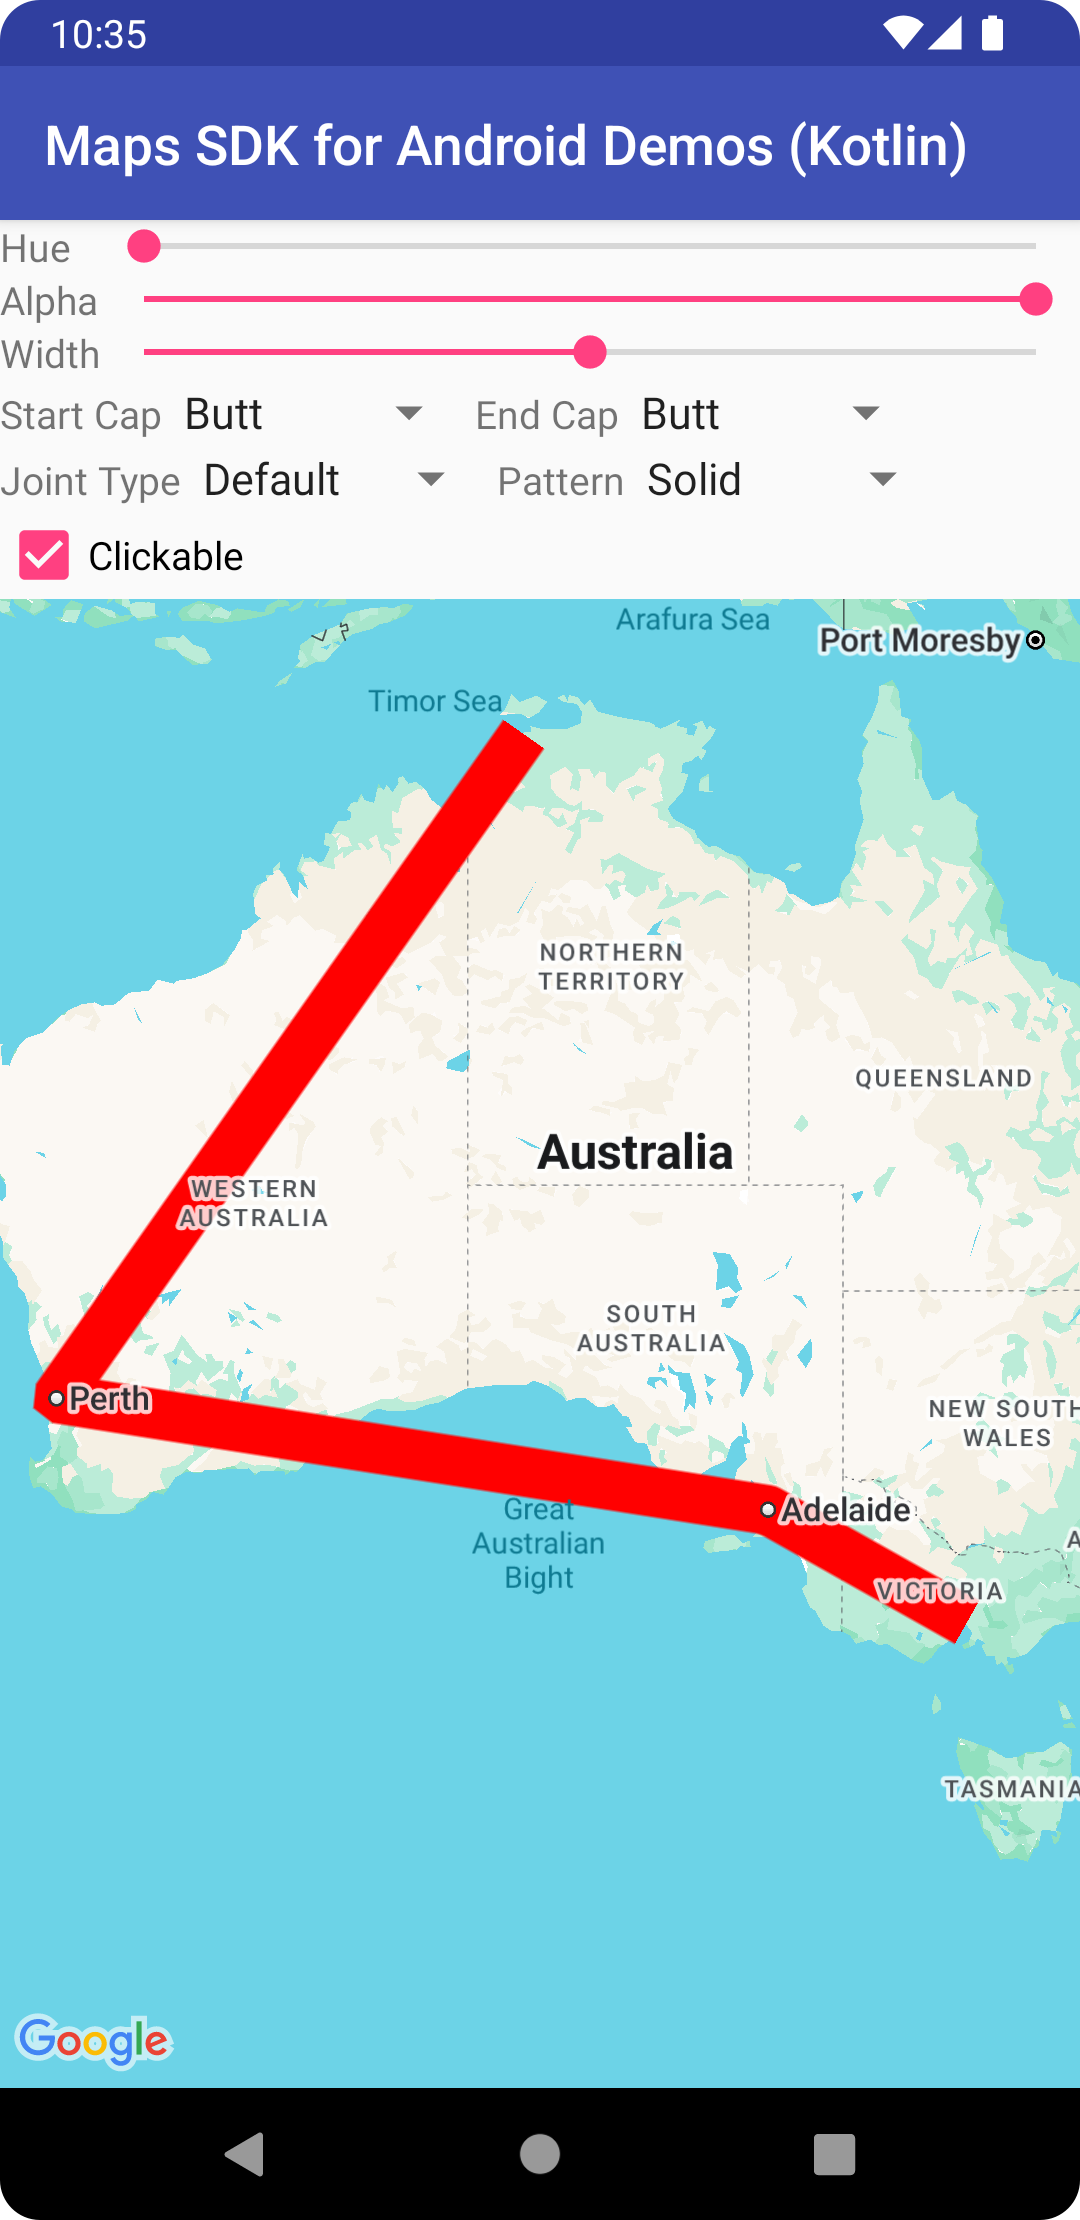
Polylines
The Polyline class defines a set of continued line segments on the map. A Polyline object consists of a set of LatLng locations, and creates a series of line segments that connect those locations in an ordered sequence.
This video gives ideas on how to assist your users get to where they're going, using polylines to draw a path on the map.
To create a Polyline, get-go create a PolylineOptions object and add points to it. Points represent a point on the globe's surface, and are expressed every bit a LatLng object. Line segments are drawn betwixt points according to the order in which you add them to the PolylineOptions object. To add points to a PolylineOptions object, call PolylineOptions.add(). Find that this method takes a variable number of parameters so you are able to add together multiple points at a fourth dimension (you can too phone call PolylineOptions.addAll(Iterable<LatLng>) if the points are already in a listing).
You lot tin then add the polyline to a map past calling GoogleMap.addPolyline(PolylineOptions). The method returns a Polyline object with which you tin alter the polyline at a later on time.
The following code snippet illustrates how to add a rectangle to a map:
Java
// Instantiates a new Polyline object and adds points to define a rectangle PolylineOptions polylineOptions = new PolylineOptions() .add(new LatLng(37.35, -122.0)) .add together(new LatLng(37.45, -122.0)) // North of the previous point, but at the same longitude .add(new LatLng(37.45, -122.2)) // Aforementioned latitude, and 30km to the west .add together(new LatLng(37.35, -122.2)) // Same longitude, and 16km to the s .add(new LatLng(37.35, -122.0)); // Closes the polyline. // Get back the mutable Polyline Polyline polyline = map.addPolyline(polylineOptions);
Kotlin
// Instantiates a new Polyline object and adds points to define a rectangle val polylineOptions = PolylineOptions() .add together(LatLng(37.35, -122.0)) .add(LatLng(37.45, -122.0)) // North of the previous point, only at the aforementioned longitude .add together(LatLng(37.45, -122.2)) // Same latitude, and 30km to the west .add together(LatLng(37.35, -122.2)) // Same longitude, and 16km to the due south .add(LatLng(37.35, -122.0)) // Closes the polyline. // Go back the mutable Polyline val polyline = map.addPolyline(polylineOptions)
To alter the shape of the polyline afterwards information technology has been added, you tin can call Polyline.setPoints() and provide a new list of points for the polyline.
Yous can customize the appearance of the polyline both before calculation it to the map and after information technology has been added to the map. Run across the section on customizing appearances below for further details.
Polyline events
By default, polylines are not clickable. You can enable and disable the clickability past calling Polyline.setClickable(boolean).
Use an OnPolylineClickListener to mind to click events on a clickable polyline. To gear up this listener on the map, call GoogleMap.setOnPolylineClickListener(OnPolylineClickListener). When a user clicks on a polyline, you will receive an onPolylineClick(Polyline) callback.
Polygons
Polygon objects are similar to Polyline objects in that they consist of a series of coordinates in an ordered sequence. Yet, instead of beingness open-ended, polygons are designed to ascertain regions within a closed loop with the interior filled in.
You tin add together a Polygon to the map in the same way every bit you add a Polyline. First create a PolygonOptions object and add some points to it. These points will grade the outline of the polygon. You then add the polygon to the map by calling GoogleMap.addPolygon(PolygonOptions) which will render a Polygon object.
The following lawmaking snippet adds a rectangle to a map (annotation that since we have non divers a make full colour, and the default fill colour is transparent, this will appear exactly the same as the polyline from the snippet in the previous section):
Java
// Instantiates a new Polygon object and adds points to define a rectangle PolygonOptions polygonOptions = new PolygonOptions() .add together(new LatLng(37.35, -122.0), new LatLng(37.45, -122.0), new LatLng(37.45, -122.two), new LatLng(37.35, -122.2), new LatLng(37.35, -122.0)); // Get back the mutable Polygon Polygon polygon = map.addPolygon(polygonOptions);
Kotlin
// Instantiates a new Polygon object and adds points to define a rectangle val rectOptions = PolygonOptions() .add( LatLng(37.35, -122.0), LatLng(37.45, -122.0), LatLng(37.45, -122.ii), LatLng(37.35, -122.2), LatLng(37.35, -122.0) ) // Get back the mutable Polygon val polygon = map.addPolygon(rectOptions)
To alter the shape of the polygon after it has been added, you can call Polygon.setPoints() and provide a new listing of points for the outline of the polygon.
You tin customize the appearance of the polygon both before adding it to the map and after it has been added to the map. Encounter the section on customizing appearances beneath for farther details.
Polygon auto-completion
The Polygon in the example above consists of 5 coordinates, but notice that the first and final coordinates are the same location, which defines the loop. In practice, however, since polygons ascertain airtight areas, you lot don't demand to define this terminal coordinate. If the final coordinate differs from the offset, the API will automatically "close" the polygon past appending the first coordinate at the end of the sequence of coordinates.
The below two polygons are equivalent, and calling polygon.getPoints() for each of them will return all four points.
Java
Polygon polygon1 = map.addPolygon(new PolygonOptions() .add(new LatLng(0, 0), new LatLng(0, 5), new LatLng(3, five), new LatLng(0, 0)) .strokeColor(Color.Ruby) .fillColor(Color.Blue)); Polygon polygon2 = map.addPolygon(new PolygonOptions() .add(new LatLng(0, 0), new LatLng(0, v), new LatLng(3, 5)) .strokeColor(Color.Ruddy) .fillColor(Color.Bluish));
Kotlin
val polygon1 = map.addPolygon( PolygonOptions() .add( LatLng(0.0, 0.0), LatLng(0.0, 5.0), LatLng(3.0, five.0), LatLng(0.0, 0.0) ) .strokeColor(Colour.RED) .fillColor(Color.BLUE) ) val polygon2 = map.addPolygon( PolygonOptions() .add( LatLng(0.0, 0.0), LatLng(0.0, 5.0), LatLng(iii.0, 5.0) ) .strokeColor(Color.RED) .fillColor(Colour.Bluish) )
Create a hollow polygon
Multiple paths can be combined in a single Polygon object to create complex shapes, such equally filled rings, or "donuts" (where polygonal areas appear inside the polygon as "islands"). Complex shapes are always the composition of multiple, simpler, paths.
Two paths must be divers in the same area. The larger of the 2 regions defines the fill area, and is a unproblematic polygon with no boosted options. So, pass a second path to the addHole() method. When the second, smaller path is total enclosed past the larger path, it volition appear as if a slice of the polygon has been removed. If the hole intersects the outline of the polygon, the polygon volition be rendered without whatever fill.
The below snippet volition create a single rectangle, with a smaller rectangular hole.
Coffee
List<LatLng> hole = Arrays.asList(new LatLng(1, 1), new LatLng(one, 2), new LatLng(2, 2), new LatLng(two, i), new LatLng(1, 1)); Polygon hollowPolygon = map.addPolygon(new PolygonOptions() .add(new LatLng(0, 0), new LatLng(0, 5), new LatLng(3, five), new LatLng(3, 0), new LatLng(0, 0)) .addHole(hole) .fillColor(Color.BLUE));
Kotlin
val hole = listOf( LatLng(1.0, 1.0), LatLng(one.0, ii.0), LatLng(2.0, 2.0), LatLng(2.0, 1.0), LatLng(1.0, 1.0) ) val hollowPolygon = map.addPolygon( PolygonOptions() .add( LatLng(0.0, 0.0), LatLng(0.0, v.0), LatLng(3.0, v.0), LatLng(3.0, 0.0), LatLng(0.0, 0.0) ) .addHole(hole) .fillColor(Color.Blue) )
Polygon events
Past default, polygons are not clickable. You can enable and disable the clickability by calling Polygon.setClickable(boolean).
Utilise an OnPolygonClickListener to listen to click events on a clickable polygon. To ready this listener on the map, call GoogleMap.setOnPolygonClickListener(OnPolygonClickListener). When a user clicks on a polygon, you lot will receive an onPolygonClick(Polygon) callback.
Circles
In improver to a generic Polygon grade, the Maps API likewise includes specific classes for Circumvolve objects, to simplify their construction.
To construct a circle, you lot must specify the following two properties:
-
eyeevery bit aLatLng. -
radiusin meters.
A circumvolve is then divers to exist the set up of all points on the World's surface which are radius meters abroad from the given eye. Because of how the Mercator project used by the Maps API renders a sphere on a flat surface, this will appear every bit an almost perfect circle on the map when located near the equator, and will appear increasingly non-circular (on the screen) equally the circle moves away from the equator.
The following code snippet adds a circle to the map by amalgam a CircleOptions object and calling GoogleMap.addCircle(CircleOptions):
Java
// Instantiates a new CircleOptions object and defines the eye and radius CircleOptions circleOptions = new CircleOptions() .center(new LatLng(37.four, -122.1)) .radius(1000); // In meters // Go back the mutable Circle Circle circle = map.addCircle(circleOptions);
Kotlin
// Instantiates a new CircleOptions object and defines the center and radius val circleOptions = CircleOptions() .center(LatLng(37.4, -122.1)) .radius(1000.0) // In meters // Become dorsum the mutable Circumvolve val circle = map.addCircle(circleOptions)
To alter the shape of the circle afterward information technology has been added, you lot can telephone call Circumvolve.setRadius() or Circle.setCenter() and provide new values.
Yous tin customize the appearance of the circle both earlier calculation it to the map and after it has been added to the map. See the department on customizing appearances below for farther details.
Circle events
By default, circles are not clickable. You can enable and disable the clickability by calling GoogleMap.addCircle() with CircleOptions.clickable(boolean), or by calling Circle.setClickable(boolean).
Use an OnCircleClickListener to mind to click events on a clickable circumvolve. To set this listener on the map, call GoogleMap.setOnCircleClickListener(OnCircleClickListener).
When a user clicks on a circle, you will receive an onCircleClick(Circle) callback, as shown in the following code sample:
Java
Circle circle = map.addCircle(new CircleOptions() .centre(new LatLng(37.4, -122.1)) .radius(k) .strokeWidth(10) .strokeColor(Colour.Light-green) .fillColor(Color.argb(128, 255, 0, 0)) .clickable(true)); map.setOnCircleClickListener(new GoogleMap.OnCircleClickListener() { @Override public void onCircleClick(Circumvolve circumvolve) { // Flip the r, chiliad and b components of the circumvolve's stroke color. int strokeColor = circle.getStrokeColor() ^ 0x00ffffff; circumvolve.setStrokeColor(strokeColor); } }); Kotlin
val circle = map.addCircle( CircleOptions() .center(LatLng(37.four, -122.ane)) .radius(one thousand.0) .strokeWidth(10f) .strokeColor(Colour.Light-green) .fillColor(Color.argb(128, 255, 0, 0)) .clickable(true) ) map.setOnCircleClickListener { // Flip the r, chiliad and b components of the circumvolve's stroke colour. val strokeColor = it.strokeColor xor 0x00ffffff it.strokeColor = strokeColor } Customizing appearances
You lot can modify the appearance of a shape both before it has been added to the map (by specifying the desired property on the options object) or after it has been added to the map. Getters are also exposed for all properties so that y'all can easily access the current state of the shape.
The post-obit snippet adds a thick blue polyline with geodesic segments from Melbourne to Perth. The sections beneath volition explicate these properties in more particular.
Java
Polyline polyline = map.addPolyline(new PolylineOptions() .add together(new LatLng(-37.81319, 144.96298), new LatLng(-31.95285, 115.85734)) .width(25) .color(Color.BLUE) .geodesic(truthful));
Kotlin
val polyline = map.addPolyline( PolylineOptions() .add(LatLng(-37.81319, 144.96298), LatLng(-31.95285, 115.85734)) .width(25f) .color(Color.Bluish) .geodesic(true) )
Note: While most of these can exist applied to any of the shapes described, some of the backdrop may not brand sense for sure shapes (e.k., a Polyline can't have a fill color because it doesn't have an interior).
Stroke color
The stroke colour is a 32-bit alpha-red-light-green-blue (ARGB) integer specifying the opacity and colour of the stroke of the shape. Set up this belongings on the shape'south options object by calling *Options.strokeColor() (or PolylineOptions.color() in the case of a polyline). If unspecified, the default stroke color is black (Color.BLACK).
Later the shape has been added to the map, the stroke colour may be accessed past calling getStrokeColor() (or getColor() for a polyline) and may be changed past calling setStrokeColor() (setColor() for a polyline).
Fill colour
Fill color only applies to polygons and circles. It does not utilize to polylines as they do non have defined interiors. For a polygon, the regions inside its holes are not part of the interior of the polygon and will not exist colored in if a fill up color is set.
The fill color is a 32-chip alpha-ruddy-light-green-blue (ARGB) integer specifying the opacity and color of the interior of the shape. Fix this property on the shape'south options object by calling *Options.fillColor(). If unspecified, the default stroke color is transparent (Color.TRANSPARENT).
After the shape has been added to the map, the fill color may be accessed by calling getFillColor() and may exist inverse by calling setFillColor().
Stroke width
The width of the line stroke, as a bladder in pixels (px). The width does not calibration when the map is zoomed (i.e., a shape will have the same stroke width at all zoom levels). Set this belongings on the shape'southward pick object by calling *Options.strokeWidth() (or PolylineOptions.width() for a polyline). If unspecified, the default stroke with is 10 pixels.
Afterwards the shape has been added to the map, the stroke width may be accessed by calling getStrokeWidth() (or getWidth() for a polyline) and may be inverse past calling setStrokeWidth() (setWidth() for a polyline).
Stroke pattern
The default stroke pattern is a solid line for polylines and for the outlines of polygons and circles. You tin can specify a custom stroke pattern of PatternItem objects, where each item is a nuance, a dot, or a gap.
The following sample sets the pattern for a polyline to a repeated sequence of a dot, followed by a gap of length 20 pixels, a dash of length 30 pixels, and another 20-pixel gap.
Coffee
List<PatternItem> blueprint = Arrays.asList( new Dot(), new Gap(twenty), new Dash(thirty), new Gap(twenty)); polyline.setPattern(pattern);
Kotlin
val pattern = listOf( Dot(), Gap(20F), Dash(30F), Gap(20F) ) polyline.pattern = pattern
The design repeats along the line, starting with the kickoff pattern detail at the first vertex specified for the shape.
Joint types
For polylines and the outlines of polygons, yous can specify a bevel or round JointType to replace the default fixed miter joint type.
The following sample applies a round joint type to a polyline:
Java
polyline.setJointType(JointType.Round);
Kotlin
polyline.jointType = JointType.ROUND
The joint blazon affects the internal bends in the line. If the line has a stroke pattern that includes dashes, the joint type likewise applies when a dash straddles a joint. Joint types do not affect dots, as they are always circular.
Line caps
Y'all can specify a Cap style for each end of a polyline. The options are butt (default), square, round, or a custom bitmap. Fix the style in PolylineOptions.startCap and PolylineOptions.endCap, or use the advisable getter and setter methods.
The following snippet specifies a round cap at the get-go of a polyline.
Java
polyline.setStartCap(new RoundCap());
Kotlin
polyline.startCap = RoundCap()
The following snippet specifies a custom bitmap for the terminate cap:
Java
polyline.setEndCap( new CustomCap(BitmapDescriptorFactory.fromResource(R.drawable.arrow), sixteen));
Kotlin
polyline.endCap = CustomCap(BitmapDescriptorFactory.fromResource(R.drawable.arrow), 16F)
When you use a custom bitmap, you should specify a reference stroke width in pixels. The API scales the bitmap accordingly. The reference stroke width is the stroke width that you lot used when designing the bitmap image for the cap, at the original dimension of the epitome. The default reference stroke width is 10 pixels. Hint: To make up one's mind the reference stroke width, open your bitmap image at 100% zoom in an paradigm editor, and plot the desired width of the line stroke relative to the image.
If you use BitmapDescriptorFactory.fromResource() to create the bitmap, make sure yous use a density-contained resources (nodpi).
Geodesic segments
The geodesic setting just applies to polylines and polygons. It does non apply to circles because they are not divers as a collection of segments.
The geodesic setting determines how the line segments between consecutive vertices of the polyline/polygon are drawn. Geodesic segments are those that follow the shortest path along the Earth's surface (a sphere) and often announced equally curved lines on a map with a Mercator projection. Non-geodesic segments are drawn as direct lines on the map.
Set this property on the shape'south option object by calling *Options.geodesic() where true indicates the segments should be drawn as geodesics and false indicates the segments should be drawn as straight lines. If unspecified, the default is not-geodesic segments (fake).
Subsequently the shape has been added to the map, the geodesic setting may exist accessed by calling isGeodesic() and may exist inverse by calling setGeodesic().
Z-index
The z-index specifies the stack order of this shape, relative to other overlays (other shapes, footing overlays and tile overlays) on the map. An overlay with a loftier z-index is drawn in a higher place overlays with lower z-indexes. Ii overlays with the same z-index are drawn in an arbitrary order.
Annotation that markers are always drawn in a higher place other overlays, regardless of the z-index of the other overlays.
Set this holding on the shape's options object past calling *Options.zIndex(). If unspecified, the default z-index is 0. After the shape has been added to the map, the z-index may be accessed by calling getZIndex() and may be changed by calling setZIndex().
Visibility
The visibility specifies whether the shape should be drawn on the map, where true indicates it should be fatigued and false indicates information technology should not. It allows you to temporarily non display a shape on the map. To permanently remove shape from the map, call remove() on that shape.
Set this property on the shape's options object by calling *Options.visible(). If unspecified, the default visibility is truthful. Afterward the shape has been added to the map, the visibility may be accessed past calling isVisible() and may be inverse by calling setVisible().
Associate data with a shape
You lot tin can store an arbitrary data object with a polyline, polygon or circumvolve using the shape's setTag() method, and think the object using getTag(). For example, call Polyline.setTag() to store a data object with a polyline, and call Polyline.getTag() to call back the data object.
The lawmaking beneath defines an arbitrary tag (A) for the specified polyline:
Coffee
Polyline polyline = map.addPolyline((new PolylineOptions()) .clickable(true) .add(new LatLng(-35.016, 143.321), new LatLng(-34.747, 145.592), new LatLng(-34.364, 147.891), new LatLng(-33.501, 150.217), new LatLng(-32.306, 149.248), new LatLng(-32.491, 147.309))); polyline.setTag("A"); Kotlin
val polyline = map.addPolyline( PolylineOptions() .clickable(true) .add( LatLng(-35.016, 143.321), LatLng(-34.747, 145.592), LatLng(-34.364, 147.891), LatLng(-33.501, 150.217), LatLng(-32.306, 149.248), LatLng(-32.491, 147.309) ) ) polyline.tag = "A"
Here are some examples of scenarios when it's useful to shop and retrieve data with shapes:
- Your app may cater for different types of shapes, and you want to treat them differently when the user clicks them.
- You may be interfacing with a arrangement that has unique record identifiers, where the shapes represent specific records in that system.
- The shape information may indicate a priority to make up one's mind the z-index for the shape.
carterthaterminly.blogspot.com
Source: https://developers.google.com/maps/documentation/android-sdk/shapes
0 Response to "Draw a Circle on Google Maps Android"
Post a Comment